I found this idea from It's a hodge podge life for these adorable rag bracelets via U create and had to make them.
This is how mine turned out!!
You have to go see her version because she added a cute charm and her colors are way better :)
I found this idea from It's a hodge podge life for these adorable rag bracelets via U create and had to make them.
This is how mine turned out!!
You have to go see her version because she added a cute charm and her colors are way better :)
I know much of the country is dealing with record snow but here where you would expect to find it, here in Montana, we are trudging through slush. As you can imagine my five year old thinks this is torture he wants it to either stay snowy so he can plan in it or dry off and warm up a touch so he can ride his bike. Anyway the point to this long boring entertaining story is that we have been in need of some rainy day crafts. We did this one together the other day and my son loooooved it. I got the idea HERE from a blog I can’t get enough of called Homemade Mamas.
All you need is white shaving cream, a straight edge of some kind, food coloring and the paper to transfer your art to.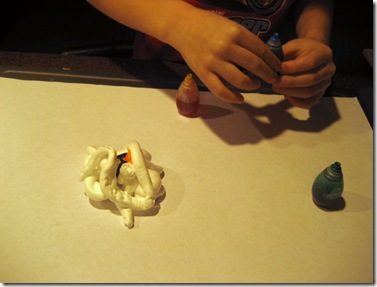
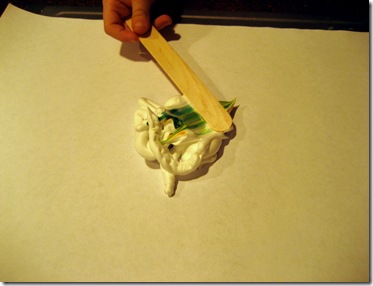 Mix it around a little and press your paper on top of your colored shaving cream then remove the paper and scrape the excess cream with a straight edge like this
And you get really cool results like this (drum roll please lol)
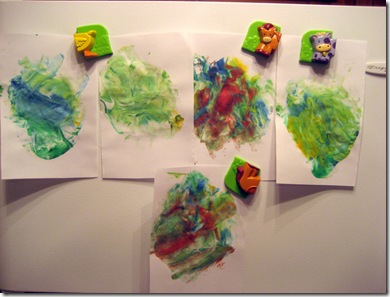 This was super easy and a really good time filler. If you make your own show us how they turn out!!
I originally got this idea for a little gift from HERE at JesseKate Designs via Be different act normal. Both sites are packed with incredible ideas just like this one. I was so proud of how mine turned out. For those of you just joining my little slice of blog heaven I am in marketing and make these little gifts to deliver monthly, so check back often to see what I am up to. I think these would be fun gifts for neighbors, co-workers, family, friends, or as centerpieces like they were originally designed for.
Also on a personal note I am super excited because today I am the side bar feature on Somewhat simple ahhhhhh I wish you could have heard the pitch of the squeal that came out of my mouth when I got the email woot woot!
I have to start by stressing three things. The first is that I have never attempted a true tutorial before so be patient and feel free to ask questions and offer constructive comments so that I can learn how to do this better lol. Second I am just learning to sew and I am sure that I have a long ways to go to be great so again helpful tips are welcome. Third and lastly I made this project without a pattern so I have no doubts it could have been done better ha ha.
This project came about because my Mom saw a stack of fabric coasters at a friend’s house and borrowed the little cutie for me to look at. After inspecting it I thought I would give it a try.
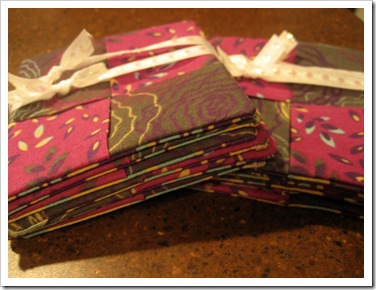 This is how they turned out. I hope this makes you want to stick around and see how I made them :)
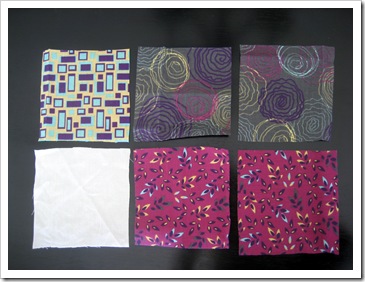 I started with six squares that are all 5x5 inches(obviously if you want larger or smaller sizes you just adjust your square sizes). The square and rectangle pattern is going to be the back. The light color is just a filler. And the other two patterns are the ones that you will see on the top where they will crisscross.
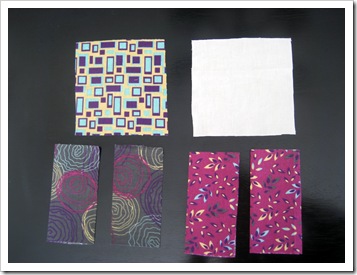 Next I ironed the back piece and filler piece flat and the top pieces are folded in half one time and ironed flat with the the side you want to see facing up.
Next is the layering. First place the filler piece down (you will never see this piece so the side that is showing won’t matter), place on top of that your back piece with the side you want to see facing up.
Now you start to crisscross your top pieces. You want to place them with the folded side facing in and the raw edges facing the outside.
Next you want to place some straight pins to hold it all together because if you are like me you move things around a bunch as you sew.
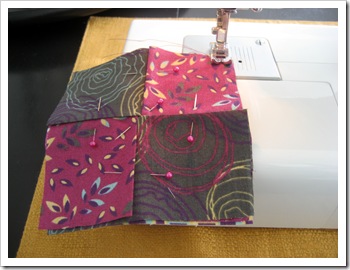 Now just sew around the edges. As straight and square as you can. I didn’t use an exact seam allowance I just went in enough to catch all of the layers.
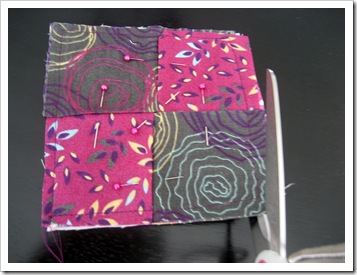 Now trim off the excess and around the edges and remove the pins.
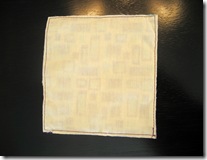
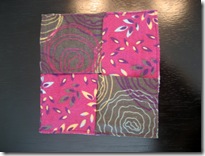 Here is a look at the front and the back before I turn it.
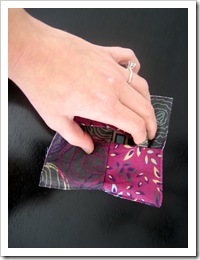 Now you want to turn it inside out where your crisscross sections meet up.
Last but not least iron them flat and get ready to enjoy them on your own table or decorate them with some ribbon to give them as a gift!
During the holiday season my friend Natalie gave our family the most delicious cookies. I begged the recipe out of her so that I could copy her brilliance for valentines day.
This is what you will need:
If you have dealt with the candy melts before and struggled like I did, Natalie also shared the dipping secret with me. We did not use a double boiler all we used was a microwave safe plastic bowl and the microwave. We put in the amount we wanted to use then micro waved for 30 seconds and gave it a stir. We continued this process until all the lumps were gone and added a few drops of peppermint oil and food coloring (yes you can buy the already colored chips but I am cheap), then dipped them like this…..
We set them on parchment to harden and later added a decorative pattern with a squeeze bottle (because that’s what Natalie did and I had to copy her heavenly cookies as closely as possible :)
I let them set up for several hours then transferred them to my cake stand. Seriously if you have the time make this project they are super easy and taste amazing.
I am glad that my Honey was around to help me with this because we got way more done together than I could have on my own (and I ate less of them during the making process because he was watching lol). And of course we gave some cookies and melted chocolate to the Little Guy so he could make his own creations (and be entertained).
I wish I could send some of these to all of you but since I can’t I thought the next best thing would be instructions on how to make your own. Let me know how yours turn out if you decide to make them.
.jpg)